S50 - Zeichnen und Schneiden
S50 - marking and cutting
Da ich ausschliesslich helle Farben des Spinnakers verwendet habe, hat sich folgende Methode bewährt:
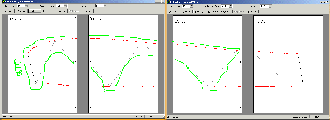
Den Plan unter den Stoff legen und mit einem wasserfesten, dünnen Stift alle benötigten linien nachzeichnen. Dabei auf eine genaue Bezeichnung der Teile bevorzugterweise in der Nahtzugabe achten. Bei vielen Teilen kann ein langes Metallineal helfen (z.B. die geraden Linien der Diagonalprofile). Auch alle Aufhängungspunkte markieren und die Stoffansätze der Diags an den Rippen (jeweils Kreise im Foilmaker-Ausdruck), ebenso die Vorderseiten der Panels und evtl. die Innen bzw. Aussenkante.
Ich habe jeweils eine Stoffbreite mit Zeichnen vollgemacht, und dann direkt geschnitten. Dabei fällt wahrscheinlich etwas mehr Abfall an, als wenn man die nächsten sauber auf Zwischenraum legt, aber man hat immer wieder kleine Erfolgserlebnisse.
Bis auf die Panels der mittleren Zelle braucht man alle Teile zweifach.

Since I only used light colors of spinnaker nylon, the following was successful to get the plan to the spinnaker:
Lay the plan underneath your fabric and draw all lines you need with a waterproof fineliner. Be sure to mark all the pieces correctly, best place is in the seam allowance. A metal ruler can help you with many parts, e.g. the straight lines on the diags. Also mark all the tow points, the sewing marks on the ribs where the diags start and the frontsides (and the inner or outer side if you want) of the panels.
I for my part drew one span of the fabric and cut all the pieces then. Probably you can save some spinnaker by layouting the next parts exactly in the free space of the previous, but I prefer the slight motivation of constantly seeing what I worked.
Except the panels of the middle cell, every part is needed twice.
Alle Teile werden mit einer gleichmässigen (na ja, mehr oder weniger) Nahtzugabe ausgeschnitten. Mein Tip: Nimm einen Zentimeter oder ein kleines bisschen mehr.
Die spitz zulaufenden Stellen der Diagonalrippen kannst Du einfach rund ausschneiden. Außerdem braucht man nur die von oben nach unten spitz zu den ersten drei Waagpunkten zulaufenden Dreiecke. Ich habe eine ganz grobe Zeichnung gemacht (bitte nicht schlagen).

All parts are cut out with a uniform (more or less ;-)) seam allowance. My Tip: one centimeter ore a little bit more.
The triangles on the diags may be cut just rounded. And you only need the triangles that are broad at the upper deck and lead to the first three bridle points on the bottom. I made a very crude drawing (please don't beat me).